

You use kitchen gadgets every day, so keeping them clean saves time and keeps food safe. Follow a few simple steps and you can remove grime, kill germs, and protect delicate parts without breaking the gadget.
Clean each gadget the way it was made to be cleaned, use mild cleaners, and dry and store parts properly to prevent damage and bacteria.
They will work better and last longer when you inspect parts, remove stuck-on food quickly, and follow the maker’s care advice.
Key Takeaways
- Use the right Gadgets cleaning method for each gadget and material.
- Sanitize and dry parts thoroughly to prevent germs and damage.
- Check and maintain parts often to extend gadget life.
Essential Steps for Cleaning Kitchen Gadgets
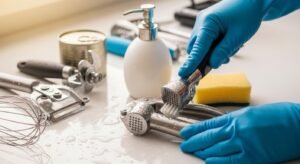
They should be treated safely, taken apart where needed, and cleaned with the right tools. This prevents damage, removes food and grease, and keeps electrical parts dry.
Pre-Cleaning Preparation
They must be unplugged and cooled before any cleaning. Heat or power can cause burns or short circuits, so wait until motors stop and hot parts reach room temp.
Remove loose debris with a dry brush or paper towel first. This reduces greasy residue and keeps drains from clogging. For sticky spots, apply a small amount of warm, soapy water to a cloth rather than pouring liquid directly on the gadget.
Check the manufacturer label or manual for dishwasher-safe parts. If unsure, hand wash removable parts in warm, soapy water and rinse thoroughly. For devices used with raw meat, sanitize surfaces after cleaning with a mild bleach solution (1 tablespoon bleach per gallon of water) or a food-safe sanitizer.
Disassembly Techniques
They should be disassembled following the manual or stamped markings. Start with large detachable pieces—lids, blades, trays—then work to smaller components. Lay parts out in order on a clean towel so reassembly is simple.
Use tools like a small screwdriver or pliers only when necessary and keep tiny screws in a labeled container. Never force stuck parts; soak them in warm, soapy water for 10–20 minutes to loosen grime. For blades and sharp parts, handle with a dish brush or rag to avoid cuts.
Keep electrical housings and motor bases dry. Wipe these areas with a damp, soapy cloth and finish with a dry cloth. If water got inside, let the unit air-dry for 24 hours or follow manufacturer drying instructions.
Selection of Cleaning Tools
They require soft brushes, non-abrasive sponges, microfiber cloths, and a bottle brush for narrow tubes. Use a nylon brush for crevices and a toothbrush for tight spots around buttons and seals.
Avoid steel wool and harsh scouring pads on non-stick or plastic parts; they scratch and reduce lifespan. For glass and stainless surfaces, a vinegar-water mix removes spots without leaving residue. For tough grease, apply a paste of baking soda and water, let it sit 10 minutes, then scrub gently.
Keep a small spray bottle of 70% isopropyl alcohol or a food-safe sanitizer handy for quick disinfecting of handles and touchpoints. For official safety and sanitation guidance, refer to FDA food-safety recommendations and the Consumer Product Safety Commission for appliance care.
Effective Cleaning Methods for Different Materials
Use warm water, a mild detergent, and the right tools for each material. Focus on removing food residues, avoiding abrasive cleaners, and drying fully to prevent stains or rust.
Plastic Gadgets
Plastic parts often hold stains and odors. Wash them soon after use with warm, soapy water and a soft sponge. For stuck-on food, soak 10–15 minutes to loosen residue before scrubbing.
Avoid scouring pads and bleach on thin or printed plastic; they can scratch surfaces and fade labels. For odor removal, mix 1 tablespoon baking soda with a cup of warm water and soak for 15–30 minutes, then rinse. Dishwasher-safe plastics can go on the top rack; check the gadget’s label first to avoid warping.
If plastics develop grease buildup, use a small amount of white vinegar in the rinse to cut oil. Dry pieces with a towel or air-dry completely before reassembly to stop mold or mildew.
Stainless Steel Surfaces
Stainless steel resists rust but shows fingerprints and water spots. Rinse loose debris, then wash with warm water and a few drops of dish soap using a microfiber cloth. Wipe in the grain direction to prevent streaks.
For grease, make a paste of baking soda and water, apply gently with a soft cloth, then rinse. To remove hard water spots, wipe with equal parts white vinegar and water, then rinse and buff dry with a clean cloth. Avoid steel wool and abrasive powders; they can scratch and expose softer metal underneath.
Use a small amount of mineral oil or a dedicated stainless polish to restore shine. Test any polish on an inconspicuous spot first.
Silicone and Rubber Components
Silicone and rubber resist heat but trap oils in textured areas. Remove loose food, then wash with warm, soapy water and a soft brush to reach grooves. A toothbrush works well for seams and crevices.
For stubborn oil or stains, soak 20–30 minutes in a solution of 1 cup warm water with 1 tablespoon baking soda, or use diluted white vinegar. Many silicone parts are dishwasher-safe—place them on the top rack—but check manufacturer guidance first.
Avoid prolonged exposure to harsh solvents, bleach, or abrasive scrubbers; they degrade rubber and can cause brittleness. After cleaning, dry completely and inspect seals and gaskets for cracks before reusing.
Sanitizing Kitchen Gadgets Safely
Sanitizing removes germs that washing alone can miss. Use the right sanitizer for the material, follow contact time, and dry items fully before storing.
Food-Safe Sanitizers
They should list the active ingredient and safe use instructions. Common commercial options include chlorine bleach (sodium hypochlorite) and quaternary ammonium compounds (quats).
For bleach, a typical household solution is 1 tablespoon (15 ml) of regular bleach per gallon (3.8 L) of water; apply to clean surfaces, let sit 1 minute, then air-dry. For quats, follow the product label for dilution and contact time. Always rinse gadgets that touch acidic foods if the sanitizer label requires rinsing.
Avoid mixing sanitizers with other cleaners, especially ammonia or acids, because that can produce toxic gas. Use plastic or glass measuring tools for diluting. Store concentrates out of reach and label mixed solutions with date and concentration.
(Useful references: FDA guidance on sanitizers and CDC recommendations can help with correct concentrations and safety.)
Natural Sanitizing Solutions
Vinegar and hydrogen peroxide can reduce microbes but have limits. White vinegar (5% acetic acid) works against some bacteria but is not a broad-spectrum sanitizer by itself. Use it for cutting boards or nonporous gadgets, then rinse and dry.
Hydrogen peroxide (3%) is stronger; spray on clean Gadgets surfaces, let sit 1–3 minutes, then rinse. Never mix vinegar and hydrogen peroxide directly because they form peracetic acid. A safer natural option is commercial products labeled “EPA-registered” that use plant-based active ingredients; follow label directions.
For wooden handles and porous parts, heat and steam sanitizing (dishwasher’s sanitize cycle or boiling water for removable parts rated for heat) often works better than chemical methods. Check manufacturer care instructions before applying heat or liquids.
Drying and Storage Best Practices
Dry items completely before storing. Store gadgets where air can circulate and keep clean and dry surfaces to avoid rust and bacteria.
Air Drying vs. Towel Drying
Air drying uses a dish rack or elevated mat so water drains away from crevices. It reduces lint and abrasion that towels can cause. Place knives and sharp tools point-down or flat to avoid accidents. Allow 15–60 minutes depending on material thickness; silicone and plastic dry faster than metal.
Towel drying is faster and works well for gadgets that trap water, like blenders or juicers. Use a clean microfiber or lint-free cloth and pat—do not rub hard. For tight spots, use a small brush or compressed air before towel drying. Always dry hinges, seals, and electrical contacts carefully to prevent corrosion and short circuits.
Proper Storage to Prevent Contamination
Store cleaned gadgets in a dry cabinet, drawer, or on hooks at least 6 inches off the floor. Keep items separated: use trays or dividers for utensils and a covered bin for small parts to avoid cross-contact with dirty items.
Label containers if multiple people use the kitchen to ensure clean versus used gear stays separate.
Avoid stacking wet items together; moisture trapped between pieces promotes mold. Periodically inspect seals, screws, and cutting edges for wear and clean storage areas weekly. For electrical gadgets, store cords coiled loosely and in a dry spot away from heat sources.
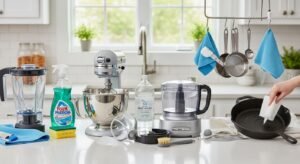
Cleaning Electric Kitchen Appliances
Focus on safety, removing food residue, and keeping seals and vents clear. Unplug devices, break them into removable parts, and dry everything before plugging back in.
Cleaning Blenders and Food Processors
They should be disassembled after each use. Remove the jar or bowl, blade, Gadgets lid, and gasket. Rinse large debris under warm water first.
Use a soft brush and dish soap to scrub blades and nooks. For stuck-on food, fill the jar halfway with warm water, add a drop of dish soap, and run the blender for 20–30 seconds. Rinse thoroughly to remove soap residue.
Check the gasket and blade base for trapped food. Replace any torn gaskets. Dry parts on a rack or towel before reassembling to avoid motor damage.
Wipe the motor base with a damp cloth. Never submerge the base or spray it directly. If odors linger, wipe the jar with a paste of baking soda and water, then rinse.
Quick reference table
| Part | Clean with | Notes |
| Jar/Bowl | Warm soapy water or dishwasher (if safe) | Check manufacturer dishwasher guidance |
| Blade assembly | Brush + soap, rinse | Handle carefully to avoid cuts |
| Gasket/seal | Soapy water, inspect | Replace if cracked |
| Motor base | Damp cloth | Avoid water entry into vents |
Wiping Down Coffee Makers
Empty and rinse the carafe and any removable filter baskets after each use. Wash these parts with warm, soapy water or place them on the top rack if the maker’s manual allows.
Descale the internal system every 1–3 months using white vinegar or a commercial descaler. Run a full cycle with the solution, then run 2–3 cycles with plain water to remove residue.
Wipe the exterior, warming plate, and control panel with a soft, damp cloth. Clean Gadgets the shower head and removable drip tray regularly to prevent buildup and bacterial growth. Replace paper filters every brew and wash reusable filters after each use.
Caring for Mixers and Handheld Tools
Unplug the mixer before removing attachments. Detach beaters, whisks, dough hooks, or bowls and wash them with warm soapy water. Most attachments are dishwasher-safe, but check the manual first.
Wipe the mixer body and motor housing with a damp cloth; use a small brush for vents and crevices. For stand mixers, tilt or lift the head and clean the hinge area where batter collects.
For hand blenders, remove the blending shaft and wash it immediately to prevent food from drying on the blades. Never immerse the motor handle. Store attachments dry to prevent rust and to keep seals in good condition.
Dealing With Tough Stains and Odors
Use targeted scrubbing, safe chemical helpers, and short soaking to remove dried food and grease. Neutralize lingering smells with baking soda, vinegar, or sunlight, and dry items fully before storing.
Removing Stubborn Residues
They should start by disassembling gadgets when possible. Remove blades, lids, and seals so each part gets direct cleaning.
Soak parts in warm water with a few drops of dish soap for 10–30 minutes. For baked-on grease, add a tablespoon of baking soda or a splash of white vinegar to the soak to loosen grime.
Use a nonabrasive scrub pad or a soft toothbrush for crevices and seals. Apply a paste of baking soda and water for scuffed areas, let it sit 5–10 minutes, then scrub gently.
Rinse parts well under running water. Dry with a clean towel or air-dry fully before reassembling to prevent trapped moisture and mold.
Eliminating Unpleasant Smells
They should first check for trapped food in seals, vents, and blade housings and remove it with a brush or cotton swab. Food bits cause most lingering odors.
For washable parts, soak in a solution of one part white vinegar to three parts water for 15–30 minutes to neutralize smells. Rinse thoroughly afterward.
Sprinkle baking soda inside containers or non-electrical bowls, let sit overnight, then wipe or vacuum out to absorb odors. For electrical components, place an open box of baking soda nearby in a closed cupboard for a day.
Sunlight and fresh air also help. Leave removable parts outside or in a sunny spot for a few hours to dissipate odors and speed drying.
Routine Maintenance and Inspection Tips
They should check gadgets after each use for food buildup or grease. A quick wipe prevents stains and stops smells from forming.
They should follow a weekly deep-clean Gadgets routine for items used often. Remove detachable parts and clean crevices with a small brush or toothpick if needed.
They should inspect seals, cords, and moving parts for wear. Replace frayed cords, cracked seals, or loose screws to avoid damage or safety risks.
Use a simple checklist to speed inspections:
- Visual check for cracks, rust, or discoloration
- Test moving parts for smooth operation
- Verify electrical components stay dry and undamaged
They should store gadgets dry and in their proper place. Moisture causes rust and mold, while crowded storage can bend or chip tools.
They should read and follow the manufacturer’s care instructions for each gadget. Some parts may be dishwasher-safe while others need handwashing or special care.
They should schedule minor maintenance tasks monthly, like lubricating hinges or sharpening blades. Small fixes now prevent bigger repairs later.
If a gadget shows signs of serious damage, they should stop using it until it is repaired or replaced. Continuing to use a faulty item can cause injury or ruin other kitchen tools.
FAQS
What should be cleaned after every use?
They should rinse and wipe parts that touch food, like blades, lids, and bowls. Small crumbs and grease can build up quickly and affect performance.
Can all gadgets go in the dishwasher?
No. They should check the manufacturer’s instructions first. Removable, dishwasher-safe parts can go on the top rack; motors and electronics must never go in the dishwasher.
How to remove stuck-on grease or stains?
They should soak removable parts in warm, soapy water for 10–20 minutes. A soft brush or sponge works well; avoid abrasive pads that scratch surfaces.
How often should deep cleaning be done?
They should deep clean Gadgets weekly for frequently used appliances and monthly for items used less often. Deep cleaning includes descaling, disassembling removable parts, and sanitizing crevices.
Is it safe to use bleach or strong chemicals?
They should avoid harsh chemicals on food-contact surfaces. Mild dish soap, vinegar, or baking soda solve most issues safely and reduce the risk of damage.
How should electronics be maintained?
They should unplug devices before cleaning Gadgets and use a damp cloth for external surfaces. Use compressed air for vents and crevices; never let water enter openings.
What about storage and care between uses?
They should dry parts completely before storing to prevent mold and odors. Store small parts together in labeled containers to avoid losing pieces.
Conclusion
They can keep Gadgets safe and working by cleaning them regularly and following the manufacturer’s care steps. Small daily habits, like wiping down surfaces and removing food bits, cut down on grime and odors.
Deep clean tools and appliances on a set schedule. Use warm, soapy water for most parts, vinegar or baking soda for stubborn spots, and avoid harsh abrasives on nonstick or delicate finishes.
Check removable parts for dishwasher safety before loading them Gadgets . If a part is electrical, unplug it and wipe it with a damp cloth only. That simple caution prevents damage and reduces risk.
Store gadgets dry and in a tidy place. Drying parts fully stops mold and rust. A clear storage plan helps gadgets stay organized and ready to use.
They should inspect gadgets after cleaning Gadgets for wear or damage. Replacing cracked or worn pieces keeps food safe and maintains performance. Routine checks save time and money later.